All Text, Graphics, Animations, Video, and Commentary on this website was created by, and is the intellectual property of m4040@m4040.com. All Rights Reserved. Unauthorized reproduction is punishable by up to a $500,000 fine or 5 years imprisonment for a first offense, and up to a $1,000,000 fine or up to 10 years imprisonment for subsequent offenses under the Digital Millenium Copyright Act (DMCA). Requests for use of this material should be forwarded to m4040@m4040.com.
How to Cord Wrap a Knife Handle
Another M40 Basement Project
For other projects, see my Bladesmithing pages
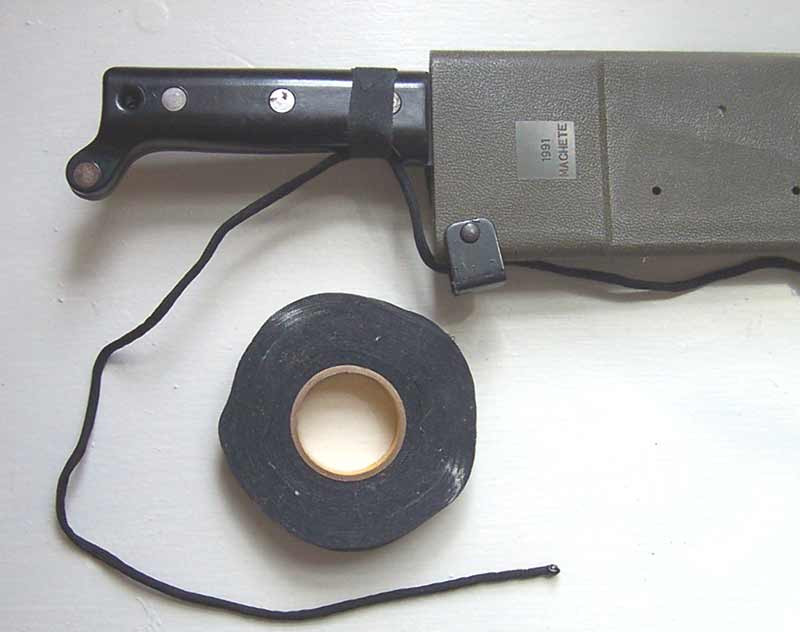
This is the simplest and most effective way I have found to cord-wrap a knife. I use the same 550 pound test Para cord that I use for just about everything in the outdoors. I have wrapped a LOT of handles, but someone just pointed out to me that I never quite explained it very well, so here goes. For sake of example, I used a US Mil Spec machete. These are the finest piece of camp hardware for the price which is only about $15/ea. I also purchased the poly sheath as shown below for an additional $15.
MATERIALS - You will need about 10 feet or more Para cord, depending on the size of the item being wrapped. You will also need some grip tape or cloth electrical tape. You can use duct tape, or most other cloth-backed tape, but I prefer the former types. The tape is used just to start the job as shown in the picture below.
STEP 1 - Tape wrap the ParaCord along the bottom of the handle as shown below. Leave about a foot of extra ParaCord extending beyond the end of the handle. Wrap the tape around the handle 2 or 3 times.
STEP 2 - You may now begin to wrap the ParaCord around the handle (see below). Start just in front of the tape, and work your way back, keeping it very tight as you go. Some have claimed that starting with the ParaCord wet will make it shrink very tight after you're done, but I didn't notice much difference either way.
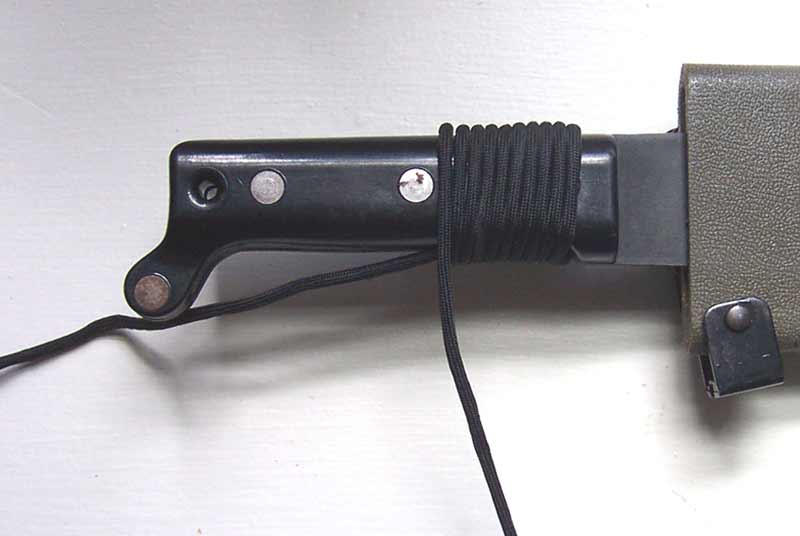
STEP 3 - When you get to the end of the handle, tightly tie the ParaCord to the end that you have left hanging. In the picture below, you'll notice that I chose to tie off behind the handle. If you have a large enough lanyard hole at the end of the handle, it looks nice to put both ends through from opposite sides, and then tie it off.

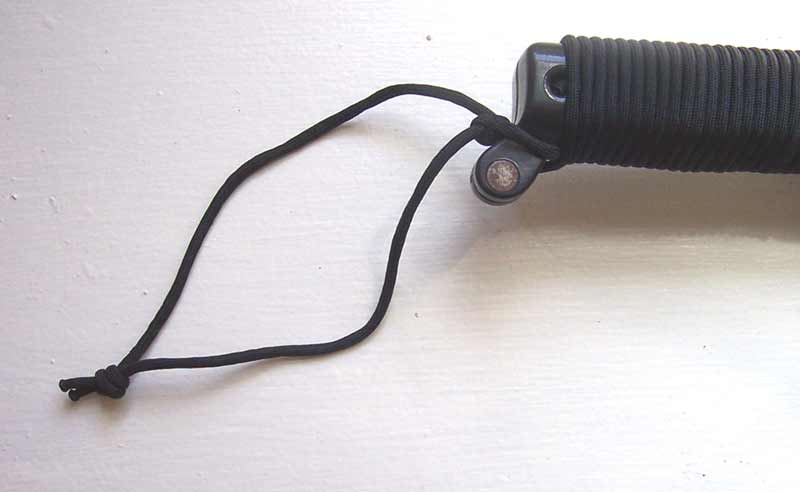
STEP 4 - With the 2 ends now hanging, I like to tie the ParaCord into a wrist loop as shown. With a little practice, this is a very nice handle for just about any tool... Good Luck!
RELATED PAGES
SURVIVAL PRIMER - A 5 step quick reference with basic tips and pointers.
FIREMAKING - Some basic, and some not-so-basic skills.
SHELTER - How to find or build it fast.
WATER - How to find and treat water.
HUNTING AND SNARING - How to scrounge up some chow using primitive weapons and tools.
NAVIGATION - How to navigate by compass
WILDERNESS CAMPING TIPS - Tips that will save you time, money, and aggravation.
BUILD A SURVIVAL KIT - Most materials are readily found, and I have sourced the rest.
Turn a $20 Ghurka Knife into a Respectable Survival Knife - Another M40 Basement Project